Monday 22 August 2016

TUT11: Let's draw the OpenCV logo

Hello guys,
In this tutorial, we are going to see how to make a logo of OpenCV. Before starting I would like you to try to make logo yourself. You can make logo of some other things like brands or anthing you like.

Here's the code


import cv2
import numpy as np

img=np.zeros((500,500,3), np.uint8)

cv2.ellipse(img, (250,100), (70,70), 135, 0, 270, (0,0,255),50)
cv2.ellipse(img, (150,280), (70,70), 10, 0, 270, (0,255,0),50)
cv2.ellipse(img, (350,280), (70,70), 315, 0, 270, (255,0,0),50)

font = cv2.FONT_HERSHEY_SIMPLEX
cv2.putText(img,'OpenCV',(75,450), font, 3,(255,255,255),2,cv2.LINE_AA)

cv2.imshow('img',img)

cv2.waitKey(0)
cv2.destroyAllWindows()


Line1-2 : Import necessary packages cv2 and numpy

Line 3 : Create a canvas using np.zeros()

Line 4-6 : Create an ellipse using ellipse function provided by OpenCV. The parameters of ellipse are                  as follows:
                   1) Image or canvas
                   2) Center
                   3) Half of the size of the ellipse main axes a and b given as (a, b).
                   4) Ellipse rotation angle in degrees.
                   5) Starting angle of the ellipse arc in degrees
                   6) Ending angle of the ellipse arc in degrees.
                   7) color
                   8) thickness

                For more info on ellipse(), click here.

Line 7 : Specify the font as hershey_simplex. You can try other fonts too here

Line 8 : If you read the previous tutorial, you may be familiar with putText() finction. It puts                            whatever text you want to write on canvas. Click here if you do not know how putText()
             works.

Line 9 : Displays the image 

Line 10 : Holds screen indefinitely until user closes the window

Line 11 : Closes any open windows.
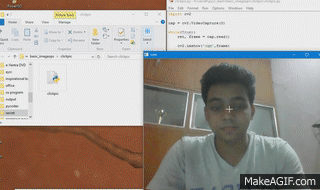

OUTPUT:


For any queries, Please ask in comment section below.

Monday 15 August 2016

TUT10: Drawing TEXT on canvas

Hello guys,
          In this tutorial, we are going to see how can we actually write a text like this one below on a canvas(drawing window).


Here's the code:


import cv2
import numpy as np
img=np.zeros((500,500,3), np.uint8)
font= cv2.FONT_HERSHEY_SIMPLEX
cv2.putText(img, 'ankit',(100,400), font, 4, (255,0,255), 2, cv2.LINE_AA)
cv2.imshow('img',img)
cv2.waitKey(0)
cv2.destroyAllWindows()

Explanation

Line1-2: import necessary packages(see previous tutorials for info on them)

Line 3: Create a canvas using zeros function 

Line 4: We need to specify a font we wish to draw in. I encourage you to see list of fonts available in              cv2 module to try with other fonts too.

Line 5: puttext() is the function that takes in various parameters as follows:
           1) canvas 
           2) String which you want to draw
           3) starting co-ordinate of the string
           4) font type which we stored in variable font
           5) font size
           6) color
           7) thickness of font(dont confuse with size)
           8) line type(click to know more)

Line 6: Show the image

Line 7-8: Hold the screen using waitKey(0) and exit all windows after the canvas is closed


Output:


That's it for this tutorial. See you in next tutorial which is going to be little interesting.

Any queries, please ask in the comment section below.

Tuesday 2 August 2016

TUT9: Drawing a POKER Face

Hello guys,
         
In this tutorial, we are going to see how to make a simple poker face ( Something like this → `_`).

Here's the code:


import cv2
import numpy as np

img=np.zeros((500,500,3), np.uint8)

cv2.circle(img, (100,100), 70, (255,0,255), 3)
cv2.circle(img, (400,100), 70, (255,0,255), 3)
cv2.circle(img, (250,250), 40, (0,255,255), 3)
cv2.line(img, (100,450), (400,450), (255,255,0), 3)

cv2.imshow('img',img)

cv2.waitKey(0)
cv2.destroyAllWindows()

Line 1-2: Import necessary libraries cv2 and numpy.

Line 3: Create a black surface using np.zeros(). Here, 500 is the height and width of window                           created which will support 3 color channels i.e. RGB.

Line 4: Draw a circle with center (100,100) and 70px radius. (255, 0, 255) will give pink color and 3                specifies the thickness of the circle. This circle is going to be the left eye of the poker face.

Line 5: Draw another circle with center (400,100) and 70px radius. This will be the right eye of the                 face.

Line 6: Draw another circle with center (250,250) and 40px radius. This will be the nose of the                        face.

Line 7: Draw a straight line from (100,450) to (400,450) co-ordinates.

Line 8: Display image using imshow() function.

Line 9-10: Hold image infinitely using waitKey(0) and close any open windows using                                           destroyAllWindows().


OUTPUT:


This will be generated when you run the code. 

That's it for this tutorial. In the next tutorial, we are going to perform some operations on image.

For any queries, use comment section below.

Sunday 17 July 2016

TUT8: Basic Drawing - Circle

In this tutorial, we are going to see how can we draw a circle using Python, OpenCV and Numpy.

Code:


import cv2                                          #Line 1
import numpy as np                                  #Line 2

img=np.zeros((500,500,3), np.uint8)                 #Line 3 

cv2.circle(img, (200,200), 150, (255, 0, 0), 2)     #Line 4

cv2.imshow('img',img)                               #Line 5

cv2.waitKey(0)                                      #Line 6
cv2.destroyAllWindows()                             #Line 7

Line 1-2: Import necessary packages

Line 3: Create a blank image using np.zeros().   #see previous tutorial to understand how it works.

Line 4: Use function cv2.circle(image, (x, y), r, color, thickness ) to create a circle on the blank                        image
  • image is the name of the blank image on which we will draw our circle
  • (x,y) is the center of the circle. 
  • r is the radius of the circle
  • color defined as (B, G, R). B, G, R represent the intensity of blue, green and red  color in your circle. Max intensity is 255 for each color. You can experiment with other value too for different color circles.
  • thickness represents the thickness of the circumference line of the circle.
Line 5: Display the picture using imshow() function. 

Line 6: Hold screen infinitely until user closes it.

Line 7: Close any open windows. 

OUTPUT:


So that's it for this tutorial. Hope you are learning to use OpenCV with Python and Numpy. See you in my next tutorial where we will learn to draw more complex drawings which will involve use of both circle and line.

Any queries , please ask in comments section below. :)

Wednesday 13 July 2016

TUT7: Basic Drawing - Line

In this tutorial, We are going to see how to draw a line using OpenCV, Python and Numpy.

Today we will learn to use two new functions:
  • np.zeros()
  • cv2.line()
So let's start:


import cv2                                                #Line 1
import numpy as np                                        #Line 2

img=np.zeros((640,480,3), np.uint8)                       #Line 3
cv2.line(img, (0,0), (480,640), (255, 0, 0), 2)           #Line 4

cv2.imshow('img',img)                                     #Line 5

cv2.waitKey(0)                                            #Line 6
cv2.destroyAllWindows()                                   #Line 7


Line 1: Import OpenCV package using "import cv2"

Line 2: Import numpy package using "import numpy as np". Here "np" is just a short name for                        numpy so if want to call a numpy function zeros() we can simply write np.zeros() instead of                numpy.zeros(). It will save your typing in longer codes.

Line 3: Here we have a new function np.zeros() which is the part of numpy package. This function                has the following syntax:


np.zeros((row,col,channel), dtype, order= 'C')
       
           It is used to create an empty black image of specified size(Row x Col). We need a surface to                draw lines, circle etc. and this function provides us that surface by creating an empty black                  surface where we can make drawings.
  •  row,col: specify row and col in terms of number of pixels for eg. (640,480)
  •  channel: specify the type of image. grayscale or color. We pass 3 for color.
  •  dtype(optional): datatype of pixel values. by default np.float64
  •  order(optional): row wise or column wise. by default 'C'           
Line 4: This is the code which actually draws a line on the black surface we made in previous line.
             The syntax is:


cv2.line(img, (start_co-ordinate), (end_co-ordinate), (color), thickness)
             
  •    img is the image that we just made using np.zeros. This specifies that we want to draw on          that image
  •    start_co-ordinate is the starting point of the line for eg. (0,0) i.e the top left of the screen
  •    end_co-ordinate is the end point of the line for eg. (480,640). Remember that 480 is the              column size and 640 is the row size. This is in contrast with what we wrote in np.zeros().
  •    color defines the color of the line you want to draw. For eg. (255,0,0) i.e. BLUE color line
  •    thickness defines the thickness of the line we want to draw. For eg. 2      
Line 5: Display the image using cv.imshow() method.

Line 6: To hold the screen infinitely we pass the argument to waitKey as 0.

Line 7: Closes all the open windows, if any.

OUTPUT:


As you can see, we are now able to draw a line using simple operations.

That's all for this tutorial, and in next tutorial we are going to learn how to draw a circle. 

Any queries, please ask in comments section below.

Friday 8 July 2016

TUT6: Recording a Video using Python-OpenCV


In this tutorial we will see how to record a video from a camera. We can use laptop camera to do this. Here is the code:


import cv2                                                             #Line1 

cap=cv2.VideoCapture(0)                                                #Line2

#Specifying codec for video
fourcc = cv2.VideoWriter_fourcc(*'XVID')                               #Line3
                          
output = cv2.VideoWriter('PyVideo.avi', fourcc, 25.0, (640,480))       #Line4

#displaying and saving the video
while(1):                                                              #Line5
    ret,frame=cap.read()                                               #Line6
    if ret==True:                                                      #Line7
        output.write(frame)                                            #Line8

        cv2.imshow('frame',frame)                                      #Line9

        if cv2.waitKey(40) == 27:                                      #Line10
            break                                                      #Line11

cap.release()                                                          #Line12
cv2.destroyAllWindows()                                                #Line13


Lets understand whats happening in the code above:
NOTE: Read Line 3 and Line 4 carefully

Line 1: Import necessary libraries

Line 2 : Initialize VideoCapture object cap. We pass 0 as argument to initialize laptop camera. Try numbers greater than or equal to 1 to initialize external camera

Line 3 : This is the most important step as in this step we are providing the info about the codec of video we are going to make. It can be 'XVID', 'MJPG', 'DIVX'  and so on. We have defined it as 'XVID'. The function we use for this is cv2.VideoWriter_fourcc(*'<type of file>') where you can replace <type of file> with supported Codecs of Videos in OpenCV.

Line 4 : Now we need to specify what will the output i.e. captured video will look like. For this will create a VideoWriter object. This object takes as input the filename(eg. movie.avi) , the FOURCC code, fps(frames per second) i.e the speed of video(eg. 20), and the resolution of the video(eg. (320,160)).

Line 5 : While loop starts

Line 6 : Capturing a frame from camera and saving in frame.

Line 7 : As we discussed in one of the previous tutorials, ret is a boolean variable which contains True if frame is captured else False. This makes sense as we will only save a frame if it is available.

Line 8 : From this line onwards we start saving the video. As the name suggest, it write onto the file mentioned in "output" object.

Line 9 : Display the frame so that you can see whats been recorded. If you omit this line, you can still record video although you wont be able to see what is being recorded.

Line 10-11 : As discussed in previous tutorials, waitKey(40) will hold the whatever is on the screen for 40 millisecond and check whether "ESC"(27 is ASCII for ESC key) key is pressed. If the key is pressed we come out of loop(due to break) and the recording stops too.

Line 12-13 : Release the camera and close all windows using these two lines.

Output:


As you can see, I am playing a file which was created after I run the program. 

So, that's it for this tutorial. Hope to see you again in my next tutorial which is going to be really interesting so do visit and like my facebook page to stay connected.

Any queries,  please ask in comments section below.
ThankYou

Saturday 2 July 2016

TUT5: Playing video file using Python-OpenCV

In this tutorial, you will learn to write a code in Python-OpenCV which can run a video file.
Let' see how to do this. Here is the code:


import cv2                                      #line1
cap=cv2.VideoCapture('chammakchallo.avi')       #line2
while(1):                                       #line3
    ret,frame = cap.read()                      #line4
    cv2.imshow('frame',frame)                   #line5
    if cv2.waitKey(25) == 27:                   #line6
        break                                   #line7
cap.release()                                   #line8
cv2.destroyAllWindows()                         #line9

Lets understand the code line by line:

Line1: OpenCV library imported first of all.

Line2: VideoCapture object 'cap' initialised with file name of the video as the argument of                              VideoCapture() function. Remember to provide the full path to video file if the video is not in              the same folder as the program.

Line3: while loop starts.

Line4: frame is captured from the camera and saved in frame variable.

Line5: cv2.imshow() used to display the frame on window named 'frame'.

Line6: cv.waitkey(25) holds the screen i.e. 'the frame' for for 25 milliseconds and also checks if ESC               key is pressed(27 is ASCII for 'ESC key'). If ESC key is pressed then break is encoutered and 
            we are out of loop.

Line7: break is a jump statement which when encountered bring program execution to the first line                 after the loop. In this case, its cap.release which is executed as it is the first line after the loop.

Line8: cap.release() release the VideoCapture object. 

Line9: cv2.destroyAllWindows() kills the active windows if any.


Output:


As you can see the video is playing after running the code. Note that you wont be able to hear the audio because OpenCV is a vision library and not an audio library. Its use is to manipulate the images,videos and not the sound. This tutorial just teaches you the basic things that you need to know about OpenCV and this feature is one of them.

That's it for this tutorial. See you in the next one where we are going to capture and save a video using a laptop camera. 

Any queries please ask in comments.

Thursday 30 June 2016

TUT4: Capture a picture with your laptop camera

This tutorial is all about how to capture an image using built in laptop camera. We will write a simple and clean code to perform this task.

NOTE: Before you go through this tutorial, please make sure you have read the previous tutorial on how to start camera using Python and OpenCV otherwise you might find this tutorial a bit difficult to understand.

  • Today, you will learn a new keyword cv2.write() that will be used to capture the image.
  • After this tutorial, you will be able to click your pictures with your own self made Python code. :)
Let's see how to do this:

1) Import necessary libraries:
    
    import cv2
    import numpy as np

2) Initialise the camera object
    
    cap = cv2.VideoCapture(0)

3) while(True):                                                      #line1  
            ret, frame = cap.read()                             #line2
            cv2.imshow('cam', frame)                          #line3
            if cv2.waitKey(1) == ord('c'):                  #line4
                    cv2.imwrite('mypic.jpg', frame)          #line5
            elif cv2.waitKey(1) == 27:                           #line6
                    break                                                  #line7

     You must be familar with #line1, #line2, #line3. If not please visit the previous tutorial.
In #line4 and #line5, we are checking for a key press 'c'. If the user presses the 'c' key on their keyboard then the current frame will be saved as a picture named "mypic.jpg" in the same folder where program is saved. The function imwrite() is used for this operation which simply takes two arguments i.e. filename and frame that you need to save.
In #line6, we see a new keyword "elif". In C or Java, we write this as "else if". Python makes it shorter by a word and makes it "elif" so its same as "else if". The condition that is checked in elif is whether "ESC" key is pressed or not(27 is ASCII for ESC key). If the "ESC" key is pressed and hold for about a second, break is encountered and we come out of loop.
One more thing worth noticing in #line6 is the use of "ord('c')". In simple words, "ord('c')" returns back the ASCII value of the character passed to it. Here 'c' is passed to it so we get 99(ASCII for 'c') as return value which is then checked with waitKey(1). If 'c' is pressed and hold for about a second, imwrite() function creates a new image file and saves the frame in that file.

4) Release the camera object and destroy all windows.

     cap.release()
     cv2.destroyAllWindows()


*************************************************
Here's the summed up code:

import cv2
import numpy as np

cap = cv2.VideoCapture(0)

while(True):
     ret, frame = cap.read()

     cv2.imshow('cam',frame)

     if(cv2.waitKey(1) == ord('c')):
           cv2.imwrite('mypic.jpg', frame)
     elif(cv2.waitKey(1) == 27):
           break

cap.release()
cv2.destroyAllWindows()

*************************************************
OUTPUT:


In the output GIF, when I hold and pressed 'c' for about a second, the picture named mypic.jpg appears in the folder where program in stored.

So that's it for this tutorial. In the next tutorial, we will see how to play a video file using your own code written in Python and OpenCV.

Any queries, please ask in comments.
Thank you


Monday 27 June 2016

TUT3: Starting laptop Camera using OpenCV and Python

Does your laptop has a Camera? Ever wondered how it starts. What's the type of code that works behind when you start your laptop camera. If not, this tutorial is for you.

We will be using some new terms today like cv2.VideoCapture(0) , cap.read() etc.

So lets see how to start the camera on laptop:

1) import cv2
    import numpy as np

2) cap = cv2.VideoCapture(0)

    Here 'cap' is a VideoCapture object. It has an argument. This argument can be either device index       or the name of a video file. Since here we are concerned with camera device so we pass device           index. I am passing '0' as the argument since the built-in webcam is mostly accessed by passing '0'.     If your system has external webcam then you can access it by typing index > '0' i.e. '1' or bigger.         Remember, this line of code will be used as it is in all the camera or video related programs.

3) Attention!! We are going to see how to use while loop in python:

    while(True):                                            #line 1
           ret, frame = cap.read()                     #line 2
           cv2.imshow('cam', frame)               #line 3
           if cv2.waitKey == 27:                     #line 4
                   break                                       #line 5
 
    cap.realease()
    cv2.destroyAllWindows()

   Remember there are no curly braces in python.  Scope is implemented using the Colon and indentation. Colon defines that following indented lines are within the while loop.
   As you can see #line 2, #line 3 and #line 4 do not start from beginning of line. There is a tab space before each of them. This indentation means they are inside of while loop and one iteration of this loop executes these lines once. Hence we need to take care of indentation. Similarly #line 5 is inside the if condition.

NOTE: When you are writing python code in IDLE(An IDE for python), the editor will automatically indent the lines once you type #line 1 and press Enter.

cap.read() will read the frame from the camera and store it in 'frame'. 'ret' will store true or false value depending on whether the frame was read or not.  cv2.imshow('cam', frame) will show the frame on to the window named 'cam'.

"if cv2.waitKey(1) == 27" holds the window for 1 millisecond and then check if the "ESC" key is pressed("27 is ASCII for ESC"). If the "ESC" key is pressed then 'break' is encountered and we are out of loop. This will also close the camera as cap.release() is executed next.

After you have written the code press CTRL+S to save the code to a desired location. Remember to save the file using .py extension. After this, press F5 to run the code while your code is open in IDLE.

**********************************************************
Here is the summed up code:

import cv2
import numpy as np

cap = cv2.VideoCapture(0)

while(1):
     ret, frame = cap.read()
     cv2.imshow('video', frame)
     if cv2.waitKey(1) == 27:
           break

cap.release()  
cv2.destroyAllWindows()
**********************************************************

OUTPUT:


So i hope that you have learned how to start your camera using Python and OpenCV.
That's it for this tutorial. In the next tutorial, we will see how to capture an image using in-built laptop camera. 
Any queries please ask in comments.
See you in next tutorial.


Saturday 25 June 2016

TUT2: Loading an image with Resizable Window

Hello everyone,

In the previous post we saw how to load an image. In this tutorial, we are going to see how to load an image in Resizable Window. This means that you will be able to resize the image as you want.

Let's start:

1) First import the necessary libraries:

    import cv2
    import numpy as np

2) Read the image:

    img = cv2.imread('hamster.jpg')

3) Create a window:

    cv2.namedWindow('image', cv2.WINDOW_NORMAL)

    Here the function namedWindow('window name', flag) is used to create a window. This window can be later used to show an image. The second parameter 'flag' refers to the type of window you want to create. These flags are given below:
  
           i) cv2.WINDOW_NORMAL :-  Resizable window
          ii) cv2.WINDOW_AUTOSIZE  :- Non-Resizable window. Program automatically assigns a                                                                         size.

There is one more flag that we will see later.

4) Displaying the image:

    cv2.imshow('image',img)

    Remember to use the same Window name in imshow() that you have created using                             namedWindow().

5) Hold the window : 

    cv2.waitKey(0)
    cv2.destroyAllWindows()

    cv2.waitKey(0) waits for a key press indefinitely. Once you press any key, the window closes.
    cv2.destroyAllWindows() closes any opened window.

After you have written the code press CTRL+S to save the code to a desired location. Remember to save the file using .py extension. After this, press F5 to run the code while your code is open in IDLE.
******************************************
Here's the summed up program:

Code:

import cv2
import numpy as np

img=cv2.imread('hamster.jpg')     #by default the second parameter is cv2.IMREAD_COLOR

cv2.namedWindow('image',cv2.WINDOW_NORMAL)        #allowing window to be resizable

cv2.imshow('image',img)

cv2.waitKey(0)
cv2.destroyAllWindows()

****************************************
Output:
  

As you can see I can now resize the displayed image.

That's it for this tutorial. If you have any doubt, you can ask me in the comments section.

ThankYou.

Thursday 23 June 2016

Configuring Python with OpenCV and Numpy

This post contains instuctions to install

• Python
• Numpy
• OpenCV

Please follow the steps given below:
1. Python
        • Download Python from the following link:
        • https://www.python.org/ftp/python/2.7.6/python-2.7.6.msi
        • Double-click the downloaded file to commence installation
        • In order to configure the environment variables,
        ◦ Right-click on 'My Computer'
        ◦ Click on 'Properties'
        ◦ Click on 'Advanced System Settings' to open the 'System Properties' dialog
           box
        ◦ Under 'System Properties', select the 'Advanced' tab
        ◦ Click on 'Environment Variables'
        ◦ Under 'system Variables', search for the variable 'Path'
        ◦ Add 'C:/Python27;C:/Python27/Scripts;' at the start of the textbox
        ◦ Click on 'OK'
        • In order to verify your installation,
        ◦ Open Command Prompt and type 'python' and press enter
        ◦ You should see the following prompt:

 2. Numpy
        • Download Numpy from the following link:
        • http://sourceforge.net/projects/numpy/files/NumPy/1.10.2/numpy-1.10.2-win32-superpack-                 python2.7.exe/download
        • Double-click the downloaded file to commence installation
        • In order to verify your installation,
        ◦ Open Command Prompt and type 'python' and press Enter
        ◦ At the python prompt, type 'import numpy' and press Enter
        ◦ You should see the following prompt:

3. OpenCV
        • Download OpenCV from the following link:
        • http://sourceforge.net/projects/opencvlibrary/files/opencv-win/3.0.0/opencv-                                         3.0.0.exe/download
        • Double-click the downloaded file to commence installation
        • Navigate to the folder opencv/build/python/2.7
        • Copy the file cv2.pyd to C:/Python27/lib/site-packages
        • In order to verify your installation,
        ◦ Open Command Prompt and type 'python' and press Enter
        ◦ At the python prompt, type 'import cv2' and press Enter
        ◦ You should see the following prompt:


Thats all for this post. Any queries, please ask in comments.
Thank You.

First Tutorial : Reading an Image

Hello everyone,
       This post is all about how to get started with OpenCV and python. We will start with very basic operation i.e "READING AN IMAGE". 

NOTE : I assume you have downloaded the required software to get started. If not, please click here to download them. I strongly recommend you to go through this post [click here] before attempting this program. There is an IDE called "IDLE" for python that we will be using to write our programs.

So let's start line by line.

1)Open IDLE(IDE for Python). First you need to import OpenCV library. To do this, type:

import cv2

2) Now import numpy library. It is used for arithmetic manipulation of images. We will use it in almost all our programs so remember to add this line in every program:

import numpy as np

Note : as np means we are giving numpy a short name np so that it is easy to use in programs. It has no other relevance than that.


3) We will now read an image using imread('imagename.extension') function provided by OpenCV library :

img  =  cv2.imread("hamster.jpg")

This line reads the image named "hamster.jpg" and stores it in the variable img. The image must be in the same folder as the program or else you need to give full path of the image. There is also a second parameter that can be passed to imread method to change the mode of image(grayscale, color, true color) but we will see that later.

4) Displaying an image:

cv2.imshow('img1', img)

Here is another method imshow('window name', image variable) which is used to show an image in a window named 'img1' as specified in the line of code above.

5) Hold the window

cv2.waitKey(0)
cv2.destroyAllWindows()

This is a special function which holds the screen for the number of milliseconds mentioned as parameter. For ex. cv2.waitKey(1000) would hold a window for 1 second. cv2.waitKey(0) will hold the window indefinitely until user closes the window himself. This can be used in more interesting ways that we will see later. cv2.destroyAllWindows(), as the name suggest destroy all the windows that were opened in a particular program. These two lines of code should be added to almost all the program we are going to do.

So that's the end of our first program. I am summing up whole program together. Here it goes:
After you have written the code press CTRL+S to save the code to a desired location. Remember to save the file using .py extension. After this, press F5 to run the code while your code is open in IDLE.

*************************************** Code:

import cv2
import numpy as np
                                                                    #this is a comment 
img = cv2.imread('hamster.jpg')                 #loads an image into img

cv2.imshow('img1', img)                            #display the image

cv2.waitKey(0)                                           #waits indefinitely
cv2.destroyAllWindows()                          #closes all the open windows

***************************************
Output:Output of the above code is an image. In my case it's a  hamster's image. Here it is: 


Image Source: smallanimalchannel.com

I hope you understood this basic tutorial on reading an image using OpenCV and Python.

Any queries please ask in the comments section or mail me at kumarankit0411@gmail.com

Thankyou.


Monday 20 June 2016

Installing OpenCV, Python and Numpy

Hello pals,

You will need to download the below mentioned softwares before proceeding with learning of OpenCV with Python:

1) OpenCV 3.0 ------- Download here
2) Python 2.7 ------- Download here
3) Numpy 1.10 ------- Download here

I have checked the links and they are working. If they do not work, Please comment and I will correct them.
NOTE: I strongly recommend you to go through this post [click here] . This post contains information on how to configure these three softwares. There is an IDE called "IDLE" for python that we will be using to write our programs.

Any queries, please ask in comments.

Thank you